Before I could build a layout, I needed a room to house it. The unfinished attic looked like a perfect candidate. It even has a full size door leading off the upstairs hallway for easy access.

|
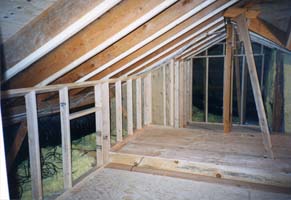
This is what the attic looked like initially, just exposed rafters and insulation. There were several beams running through the middle of the space which I decided not to mess with. The nice thing about a model train layout is that it can easily be designed to go around almost any existing obstacle.
There were also different heights on the floor (due to the varying ceiling height on the first floor), some of which were leveled out, other were left as is. |
|
I rounded up a few friends (thank Joel, Louis, Dan and Joe!) and we set to work over the course of 4 days to build the train room.
First we put in a floor, composed of two layers of 5/8" plywood. Then we framed the walls with 2x4s.
I learned quickly that my investment in a pneumatic nail gun was easily justified. We estimate that it cut the construction time in half, and also minimized the pounding vibrations on the surrounding walls and ceilings.
The roof rafters were extended by 2" to make room for extra insulation. |

|
Next I wired some outlets and light fixtures, then we added insulation to the walls and ceiling. The walls have R-19, and the ceiling has R-38.
At this point the space really started to look like a room, though it felt very closed in without real lights. |

|
The next step was drywall. The shape of the room was such that there was not a single piece of drywall which did not have to be cut in some way!
The next step was finishing the drywall, which seemed like a daunting task. I procrastinated about this step for a few weeks... |

|
Then I decided to hire some contractors to do the mudding, taping, painting and carpeting. This was a good idea!
The space now felt like a real room, and the track lighting gave it a much larger feel. |